Setup NETVS
Warning
If your organizational unit is managed by ATIS (Abteilung Technische Infrastruktur), this process will most likely not work for you, because ATIS adds another management layer on top of NETVS. Please contact ATIS for how to work with ACME.
Deprecation notice for KIT service account method
This document previously recommended using KIT-global service accounts. This practice has been superseded by NETVS service accounts. We urge all users to follow this guide for new installations. Migrating away from KIT-global service account method is strongly encouraged in the medium term.
Setup using NETVS Service Accounts
This process supports split responsibilities where the people that need certificates (called certificate users in this guide) to provide services may not also be IT officers („IT-Beauftrage“) or NETVS OU administrators.
Account and access concepts inside NETVS are explained here (German only).
Create a NETVS Service Account
Check your permissions
You need to have write access to all domains for which you want to create certificates. Please check that you are an OU administrator („OE-Betreuer“) in the respective NETVS OU. See the NETVS OU Page to check your OU assignments.
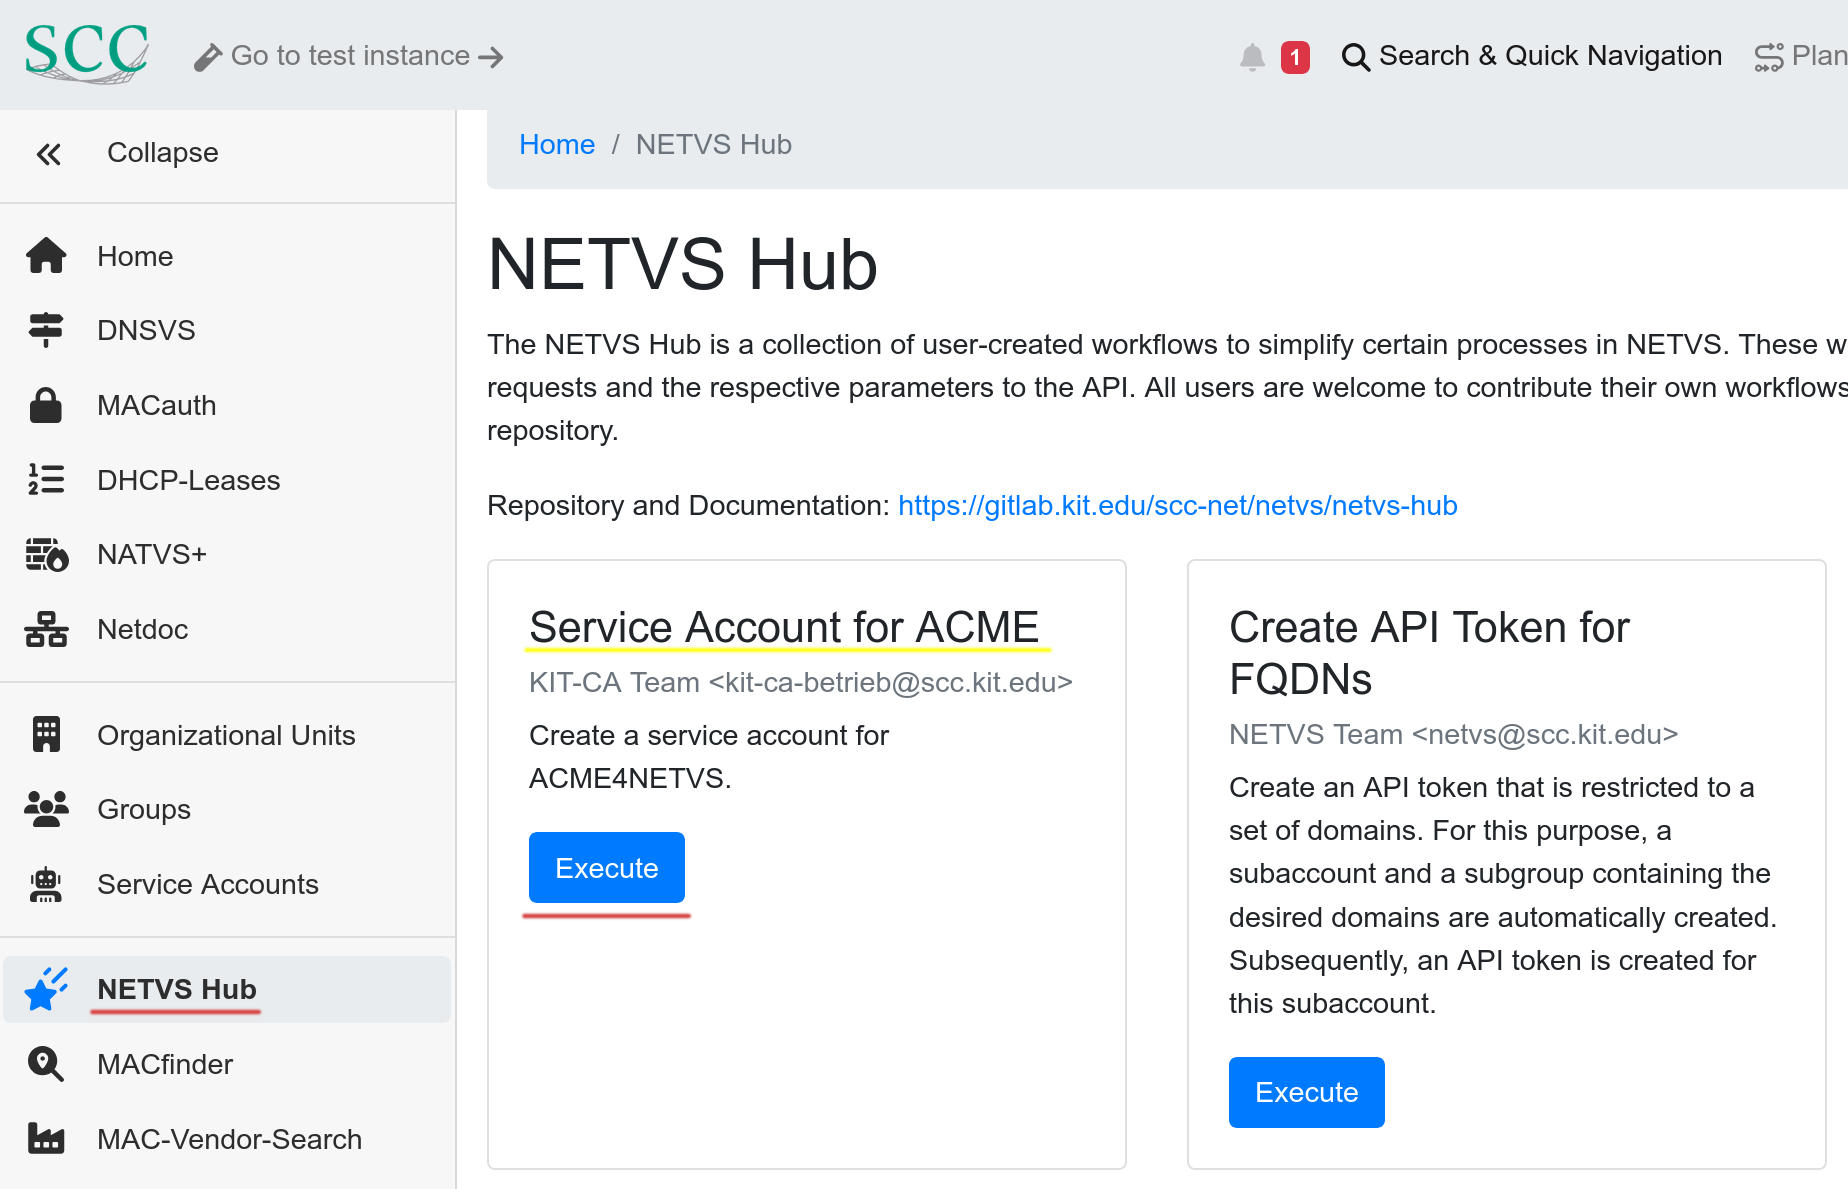
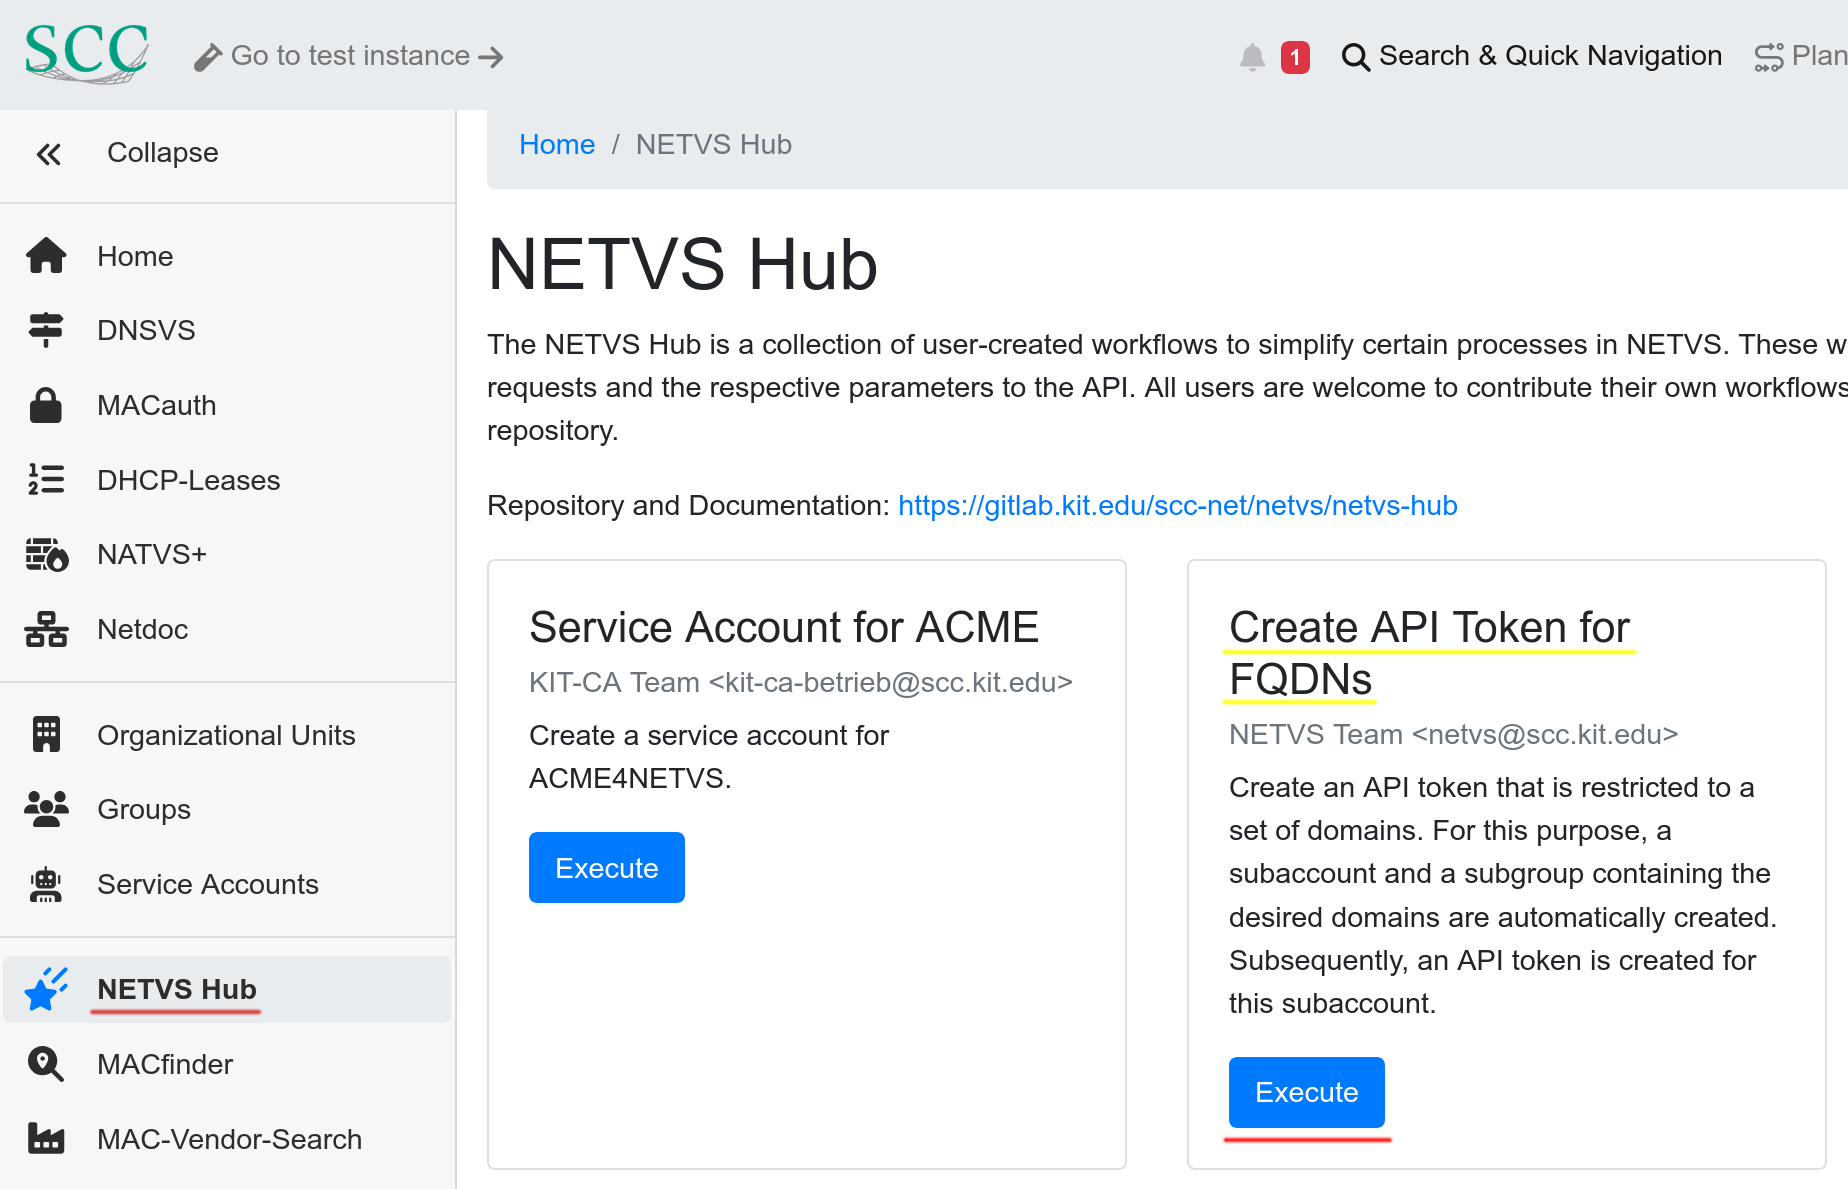
- Navigate to NETVS Hub
- Click “Execute” on “Service Account for ACME“
- Fill in the form. Please check the description of the fields for details about their contents. Add all certificate users under Managing Accounts.
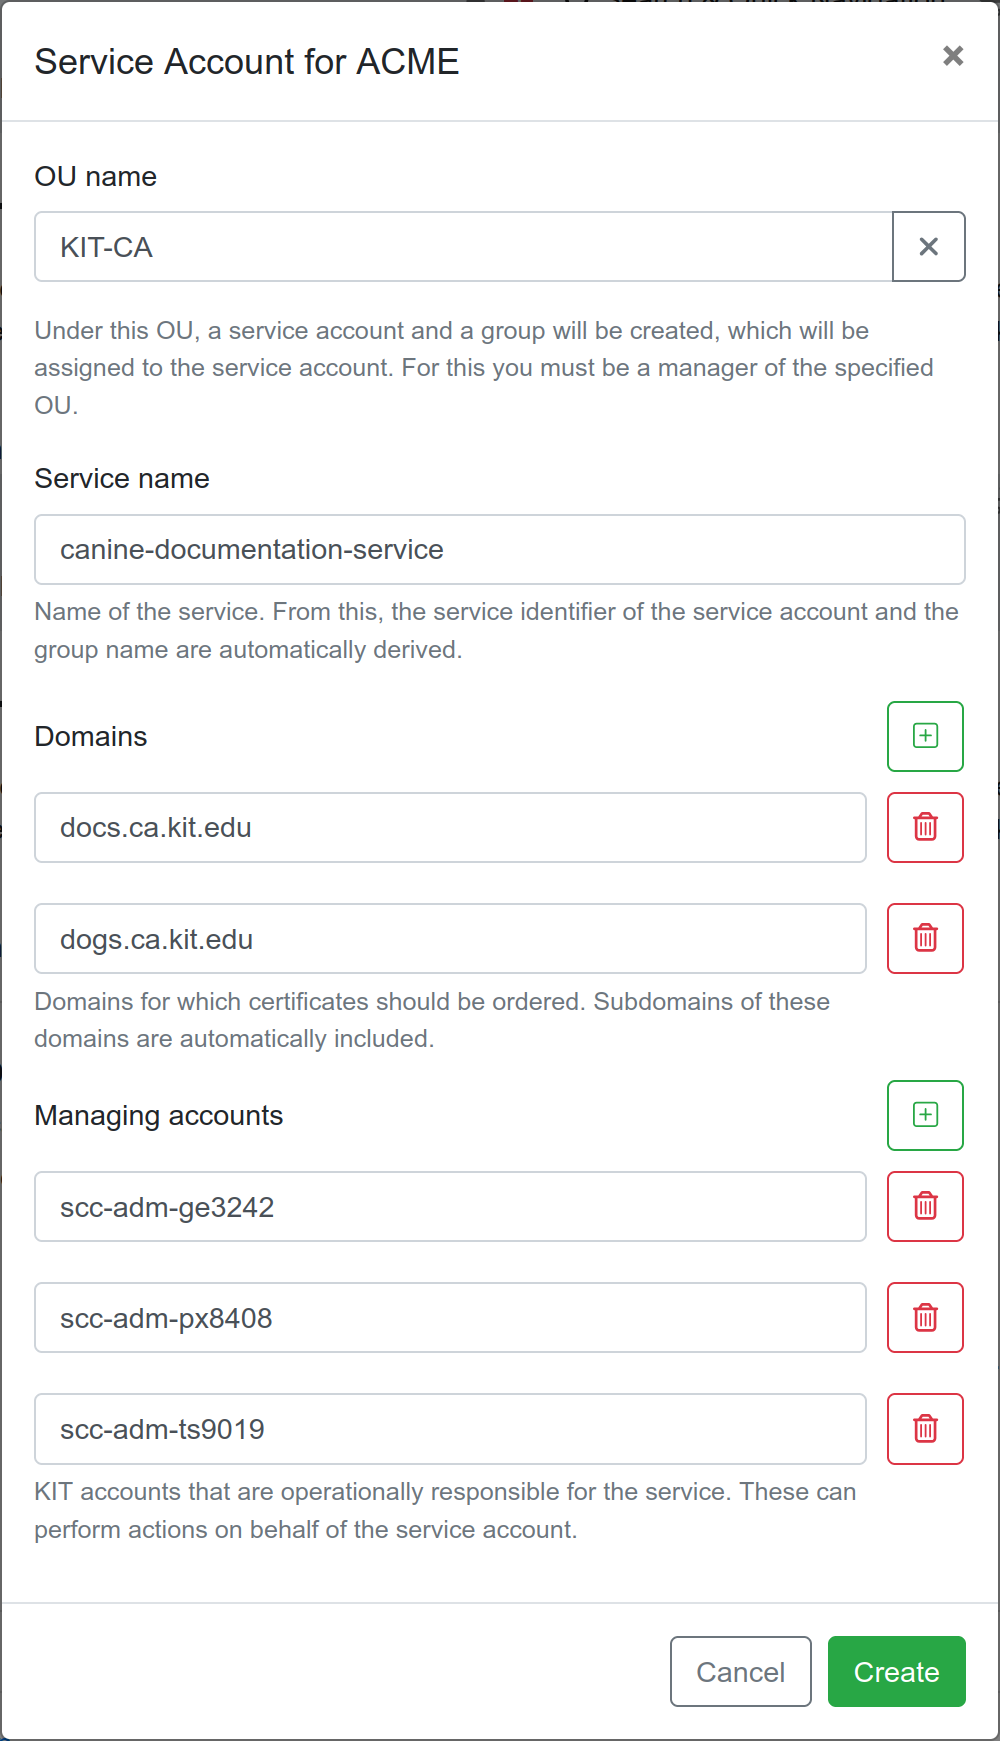
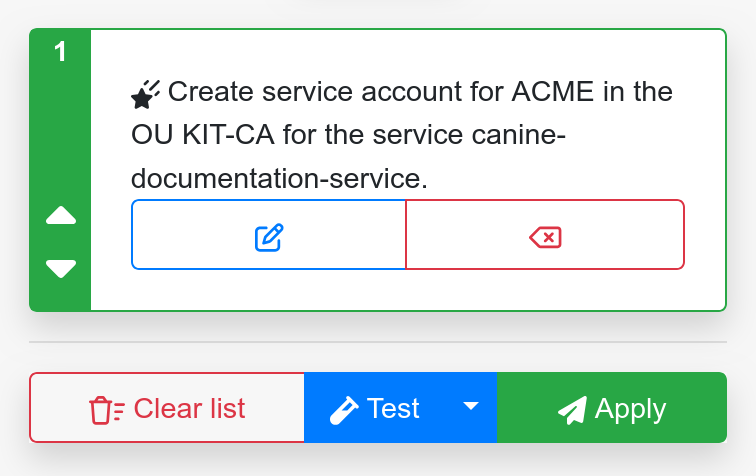
- Execute the transaction.
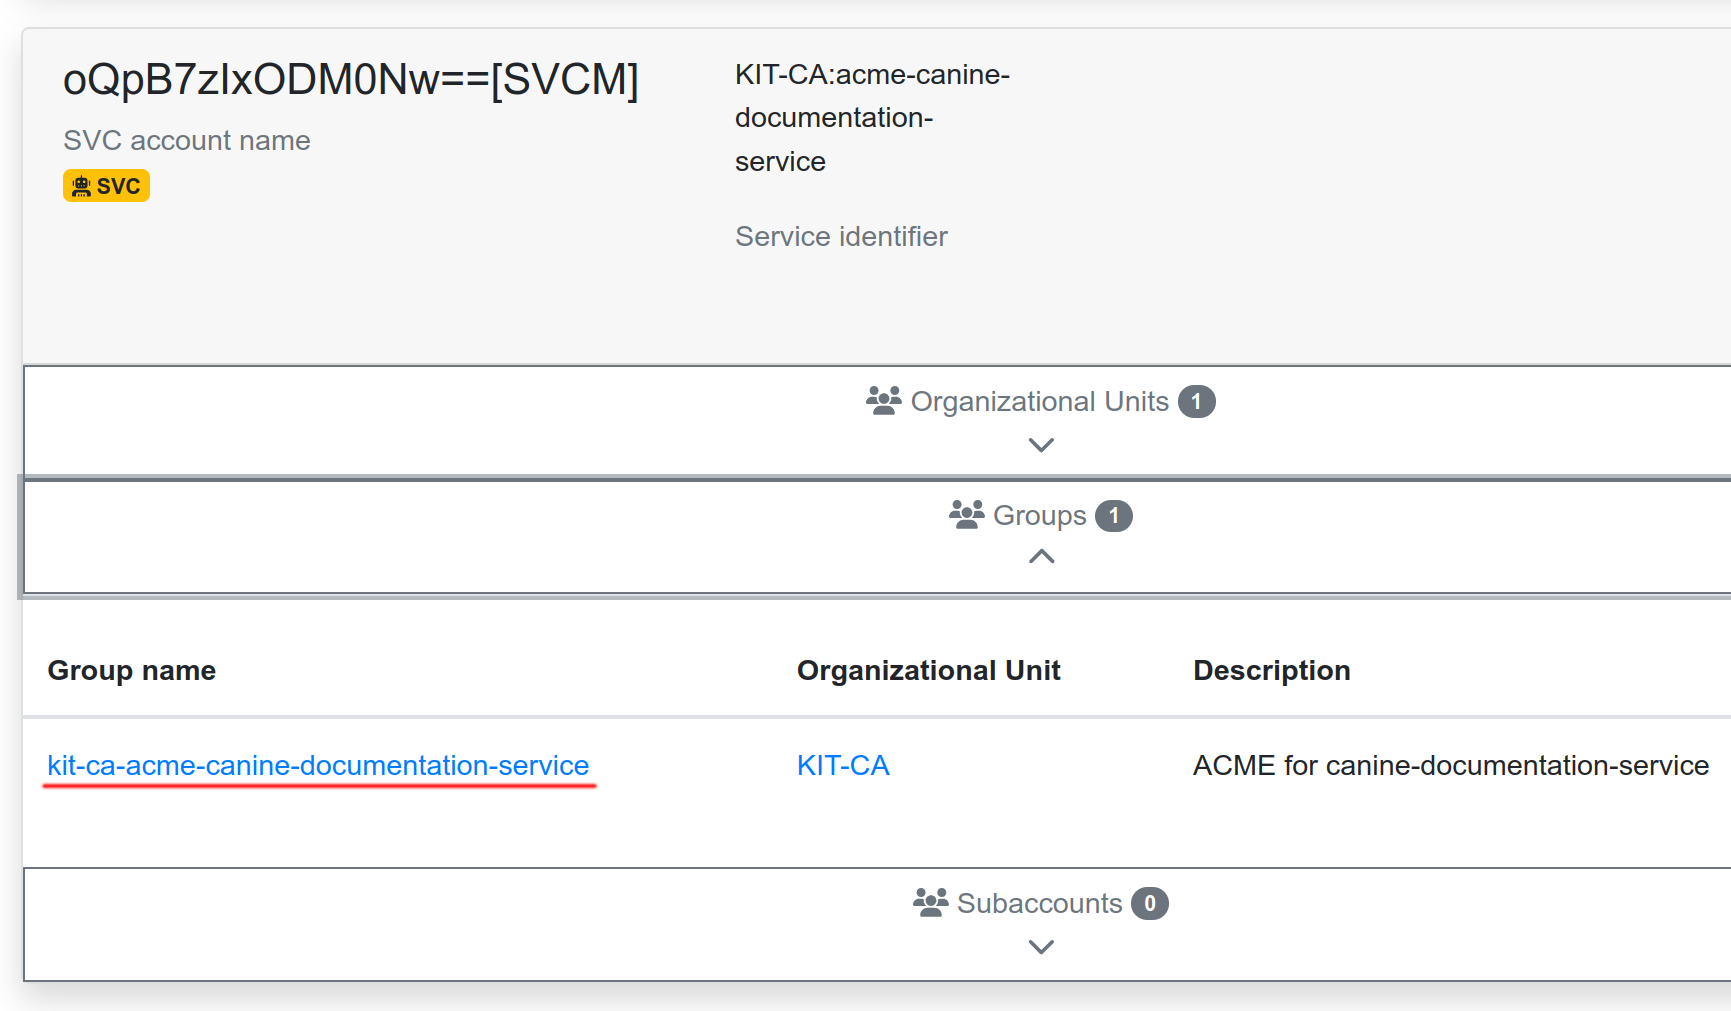
The new NETVS service account can be found on the NETVS Service Accounts page.
Create Subgroup and Token
Note
For the following steps, it is necessary that you share a group with the previously created NETVS Service Account. OU administrators can delegate service account permissions to other accounts (certificate users) by adding them to the Managing Accounts field in the Service Account for ACME dialogue.
If you can see the Service Account in the NETVS Service Accounts page, you possess all required permissions.
- Navigate to the NETVS Service Accounts Page.
- Take note of the group name which has access to the desired domain, you will need it later.
- Click the “Impersonate” button for the respective service account.

- The NETVS is now seen from the “perspective” of the service account (indicated in the page header).

- Navigate to NETVS Hub.
- Click “Execute” on “Create API Token for FQDNs”.
- Fill in the form.
- Use the group previously noted as “Group”.
- Fill in the domains for which you want to request certificates for.
- If you need certificates for a subdomain of another entry (example: you want both
test.kit.eduandtoast.test.kit.edu), only enter the topmost domain (test.kit.eduin our example). Otherwise, the transaction will fail with an error.
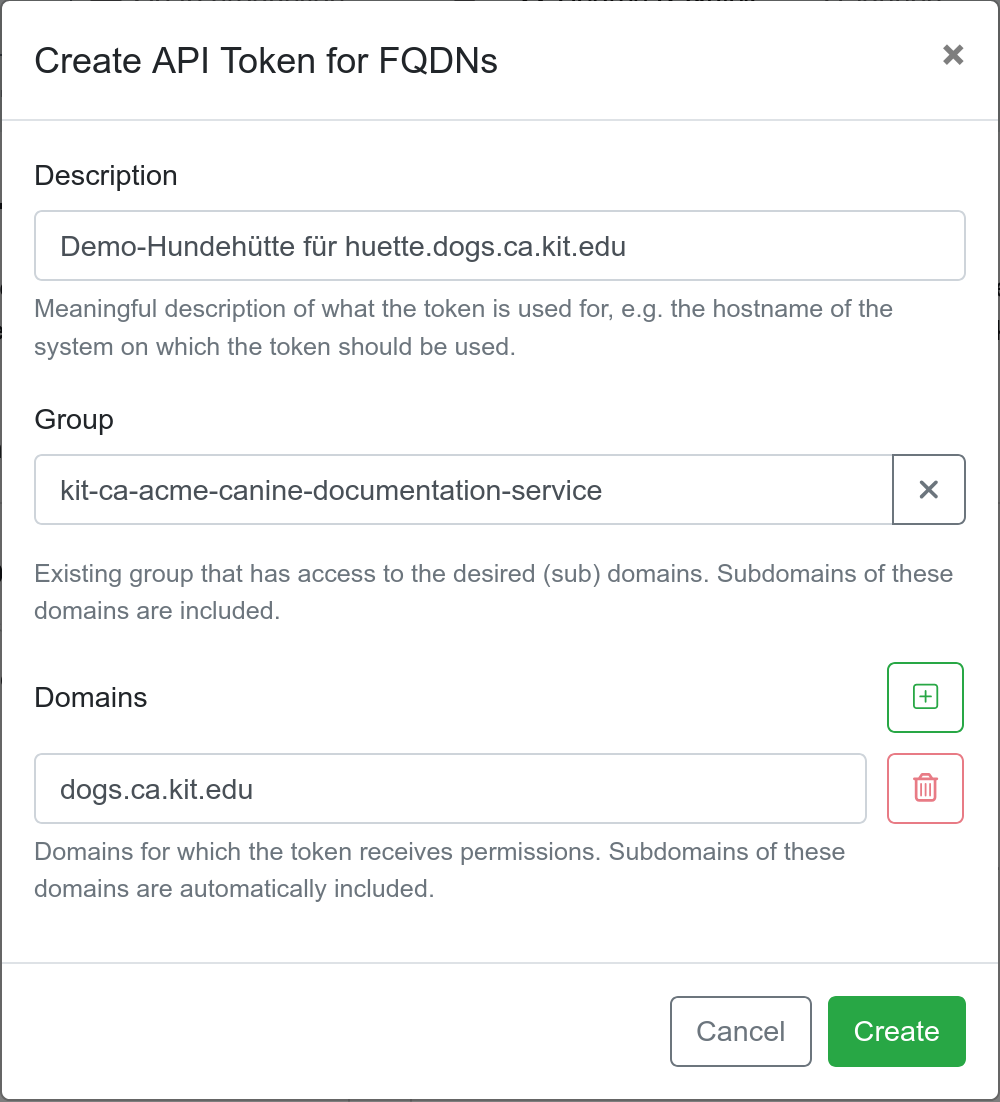
- Execute the transaction.
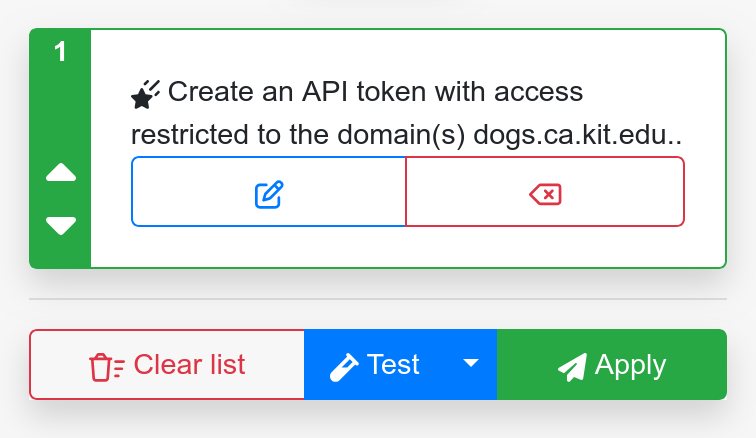
- You receive a token which possesses all required permissions to use it with ACME4NETVS.

Save the token in netdb_config.ini as described on the NETVS page. Please continue with ACME client setup (step 3) as
described here.